Map-Making: Forests and Rivers
Forests
I started by using the Mixer Brush Tool. Continuing with:
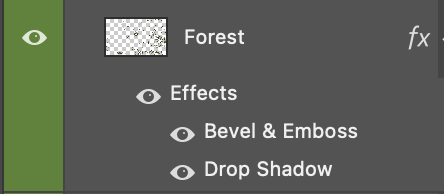
01. New layer named Forest
02. Applied these effects:
Looking like:
I then looked online for the easiest way to recreate a forest, which was to create a brush with a tree-top view .png file and therefore accelerating the process.
So in this order:
01. I created a separate New file named Tree_brush with specs Width: 29'7cm, Height: 21cm (A4)
02. Downloaded a free/paid tree-top view png file.
03. I then Place embedded.. the treetopview.png file of choice.
04. Then scaling the image transform -> scale or Command + T in a hit or miss style until I achieved the desired effect.
05. Selecting Mixer Brush Tool
06. Making sure the tip of the brush is round shaped. I used a General brush.
07. Changing the brush size to cover the entire tree.
08. Then hovering the mouse over a single tree to load the 'paint' (making sure there's no background visibility to avoid loading it as well.)
Specs looking like this:

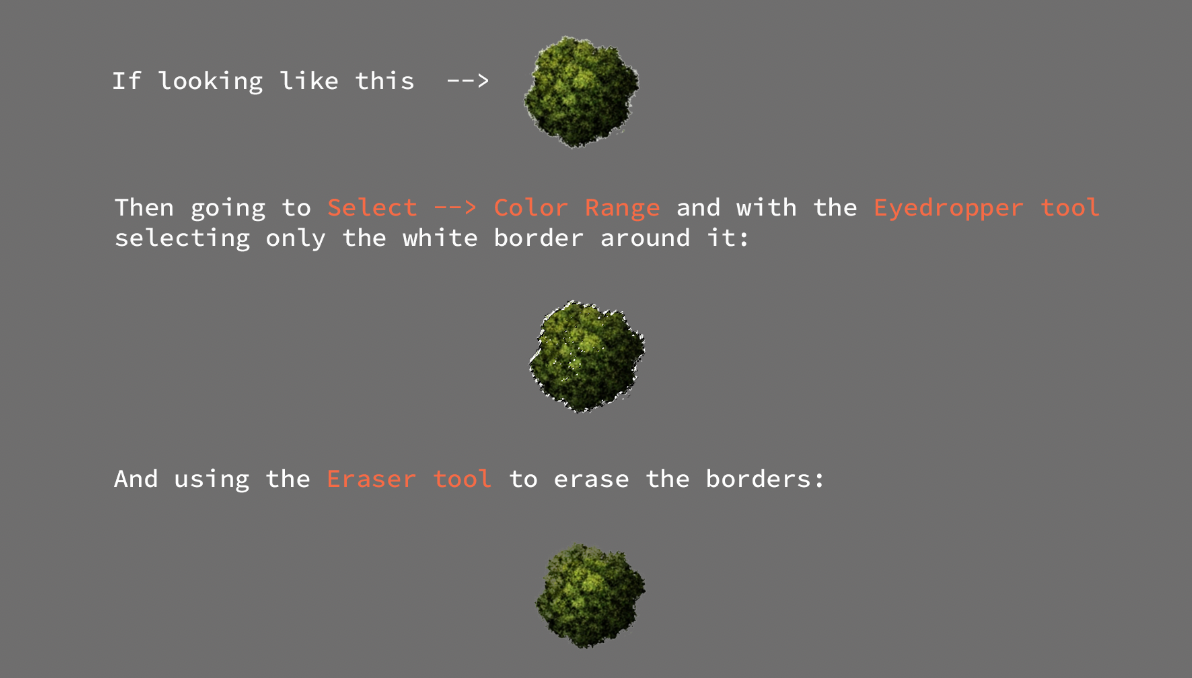
If the tree has white boarders and hasn't been cleaned properly, then:
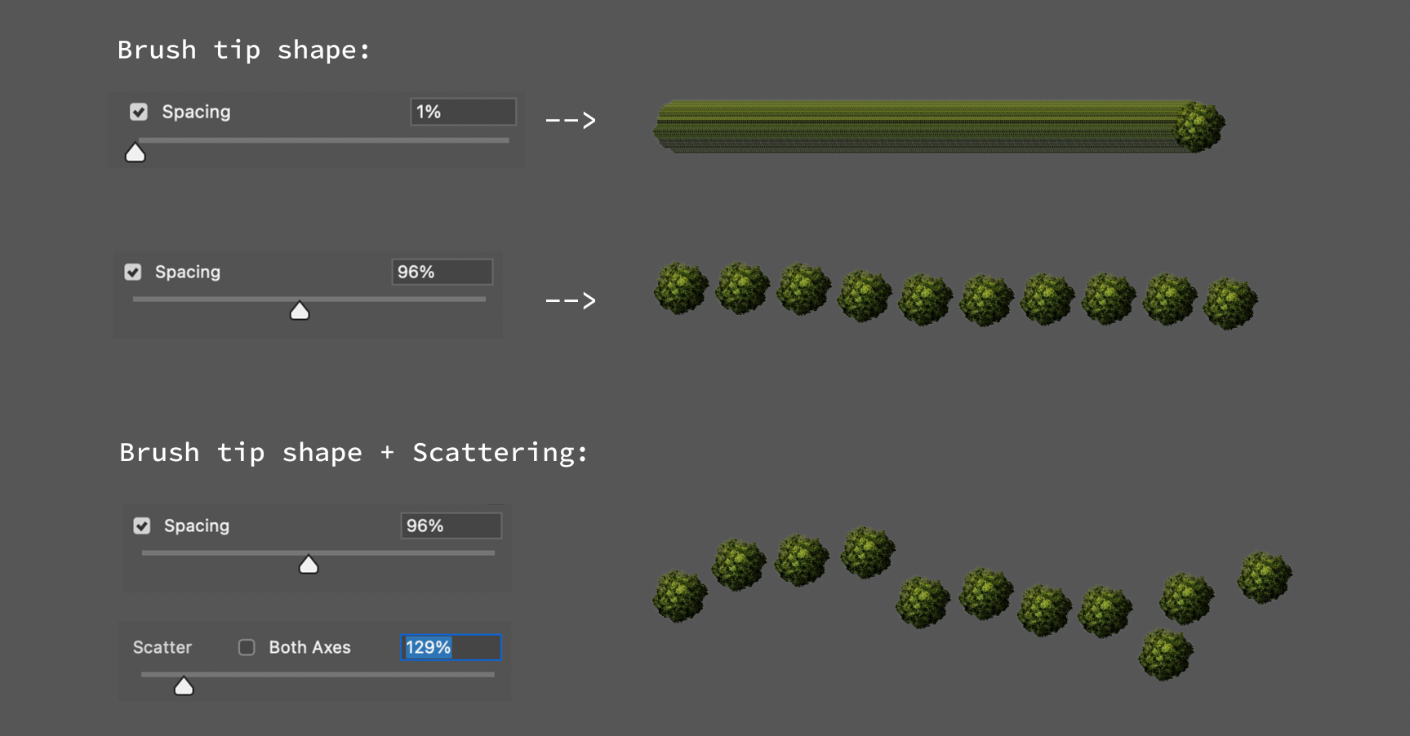
Next, I changed the Brush settings:
I went back to the main file and selected the forest layer and just played around with the new brush, changing sizes until it looked más o menos as intended.
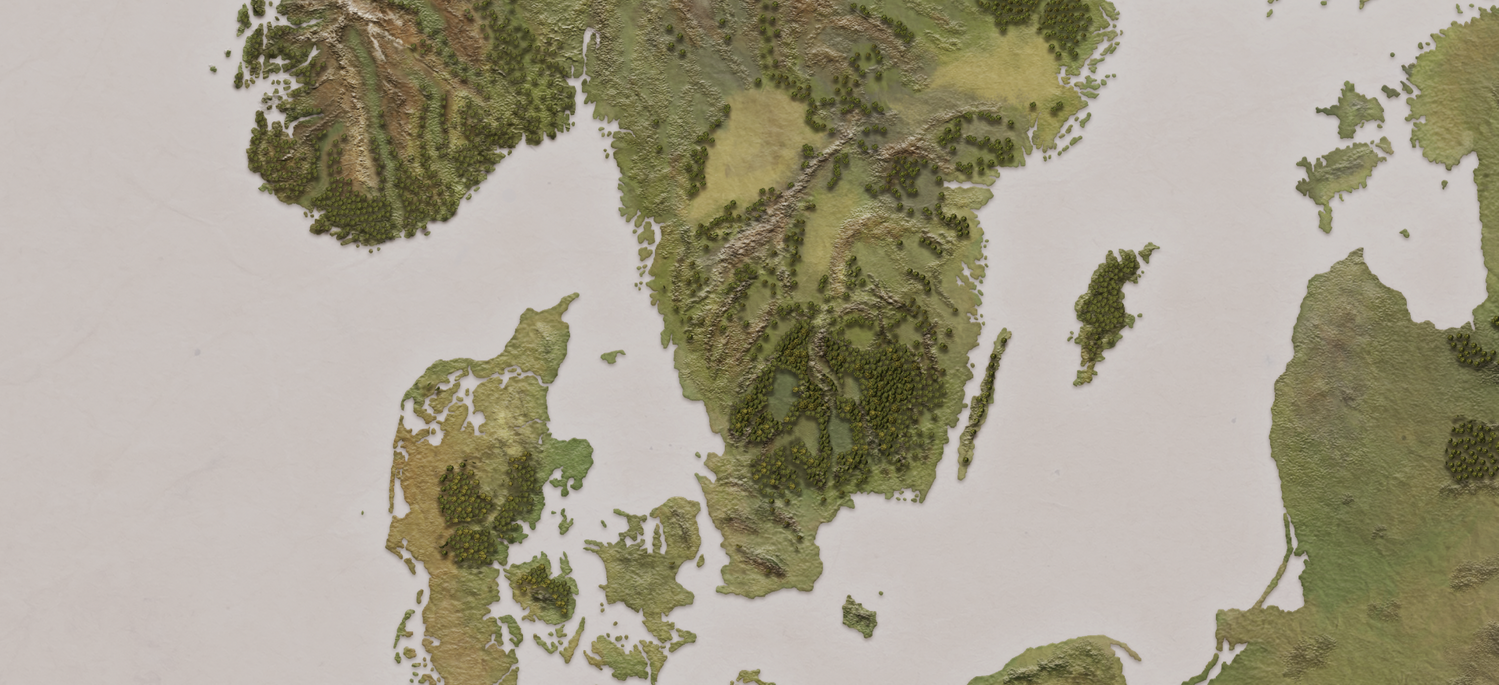
An important factor to remember is that the map is based in medieval times (1400s), meaning there were denser forests back then compared to the ones today.
In my case, I didn't use various trees because I didn't have the time to play around with details (I had already wasted a lot). Instead, I just changed the shape and color of the same tree to at least try to create a more interesting pattern.
So if you want to avoid monoculture plantations like I did, mix different trees.
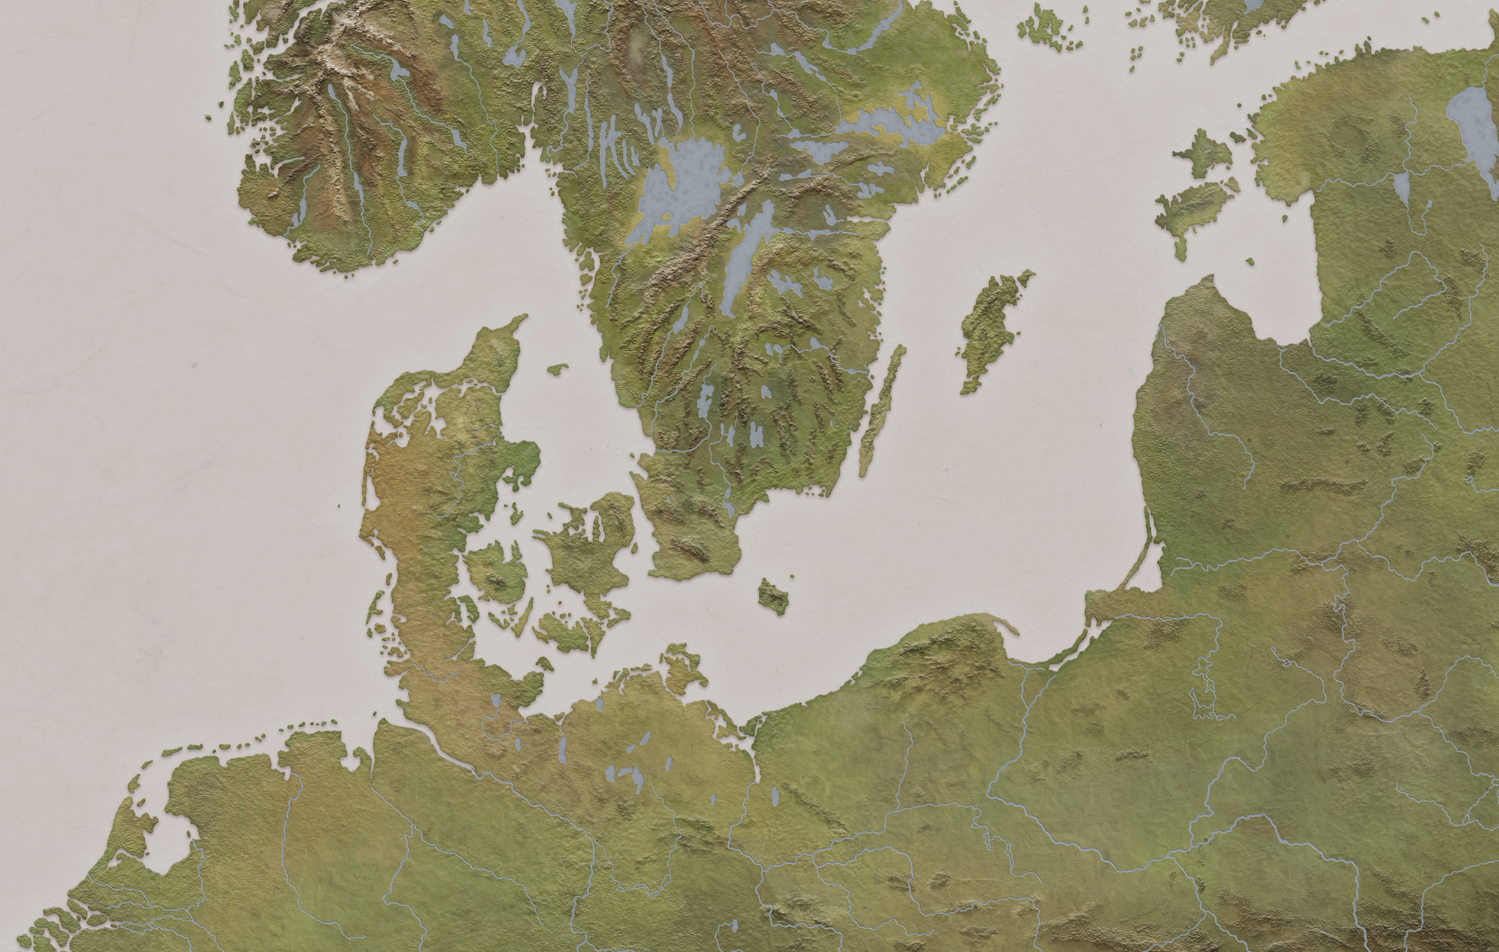
Lakes & Rivers
I went back to my initial Outline layer, and traced all rivers and lakes of interest in a new layer named River_outline. This layer was used just for reference.
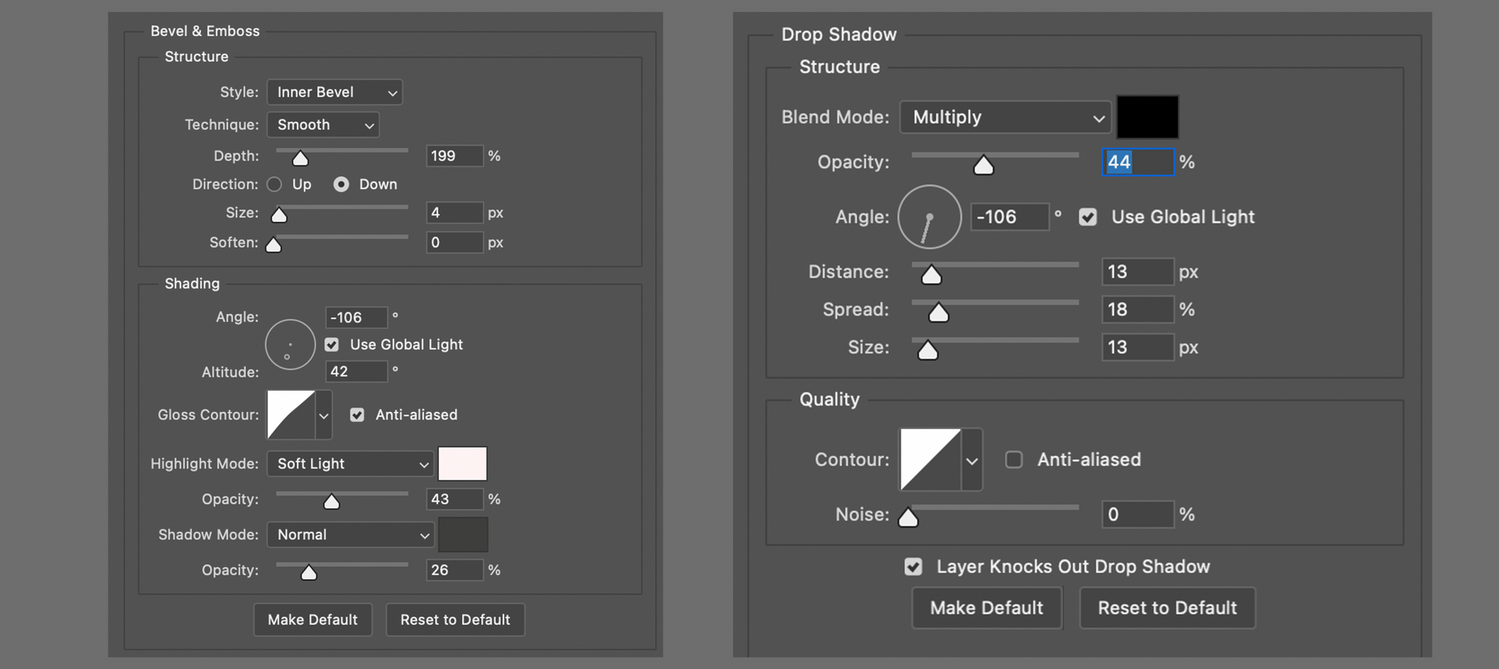
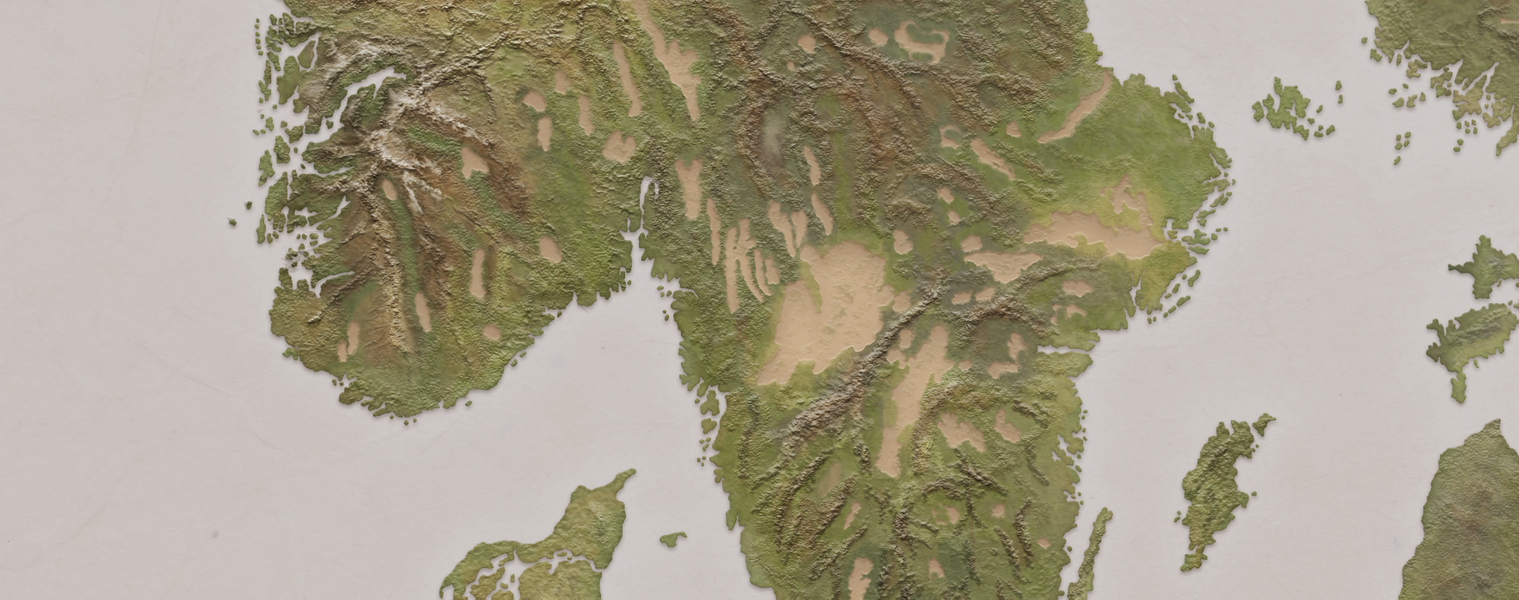
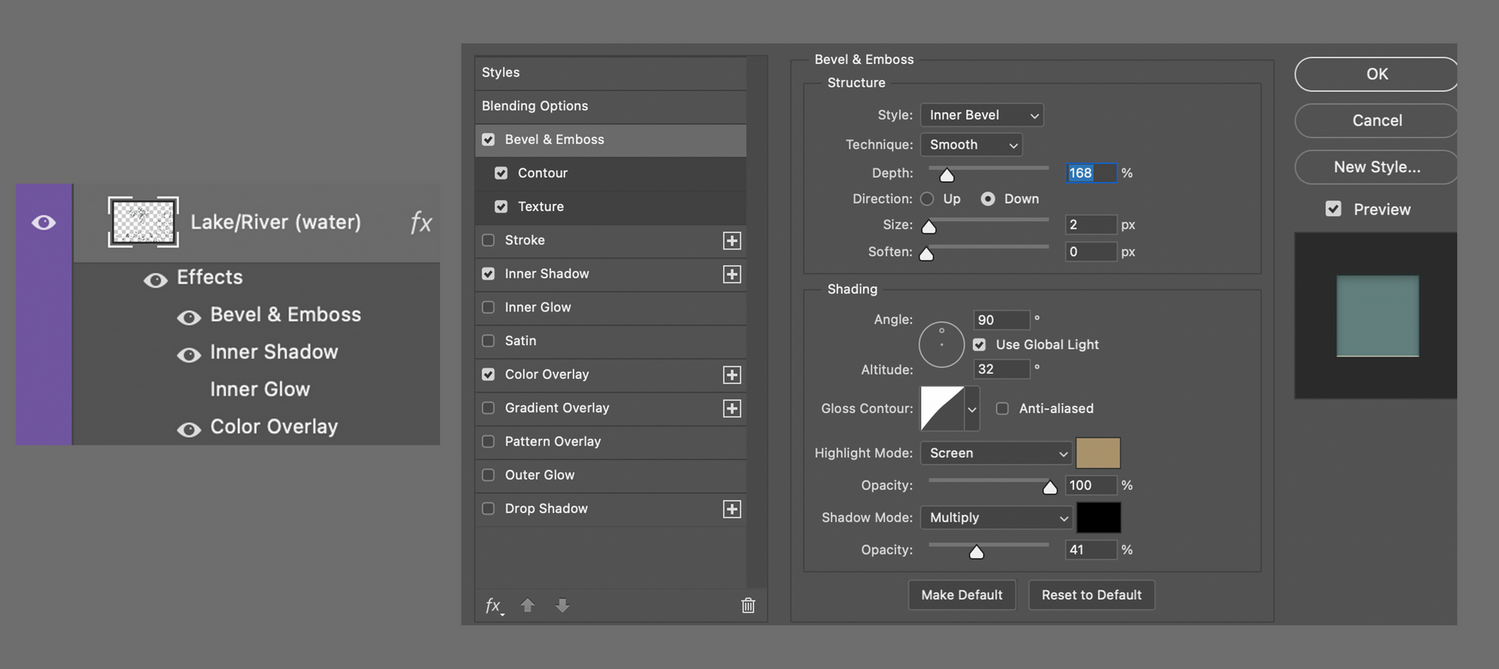
Next I moved on to draw the lake beds, creating a new layer lake(bed) and using these settings:
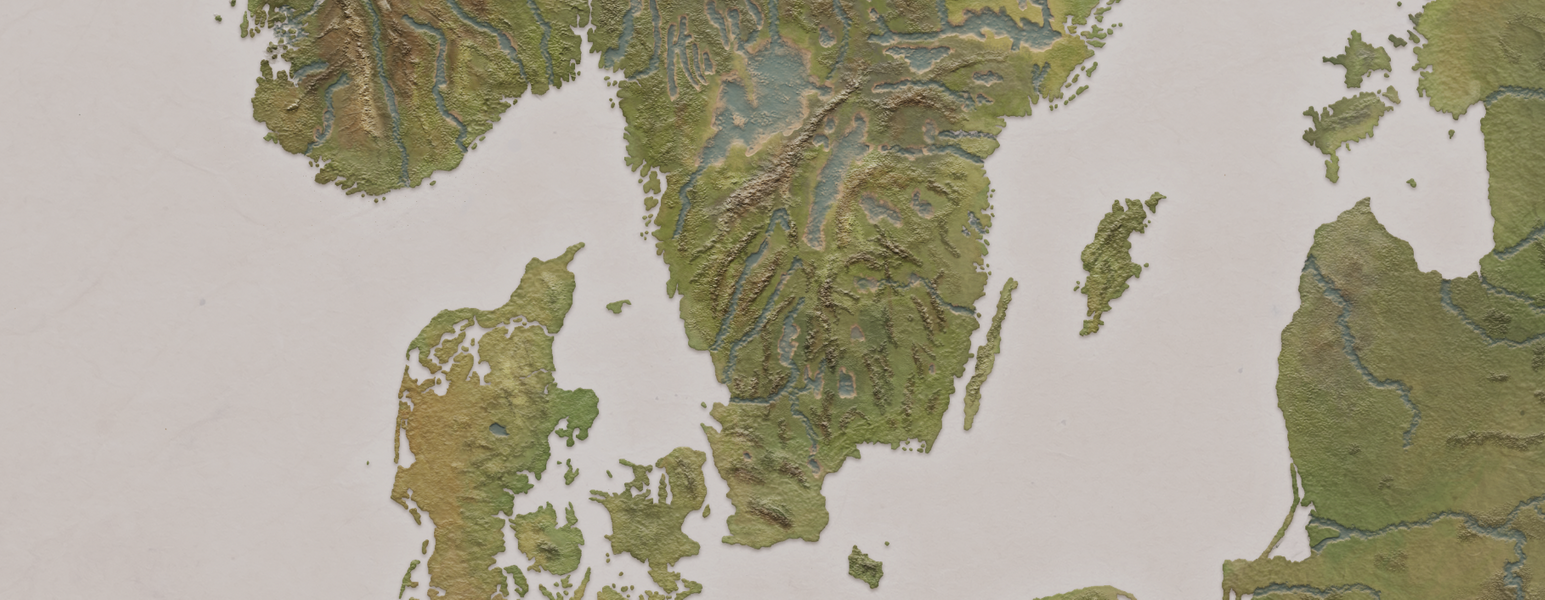
Looking like this:
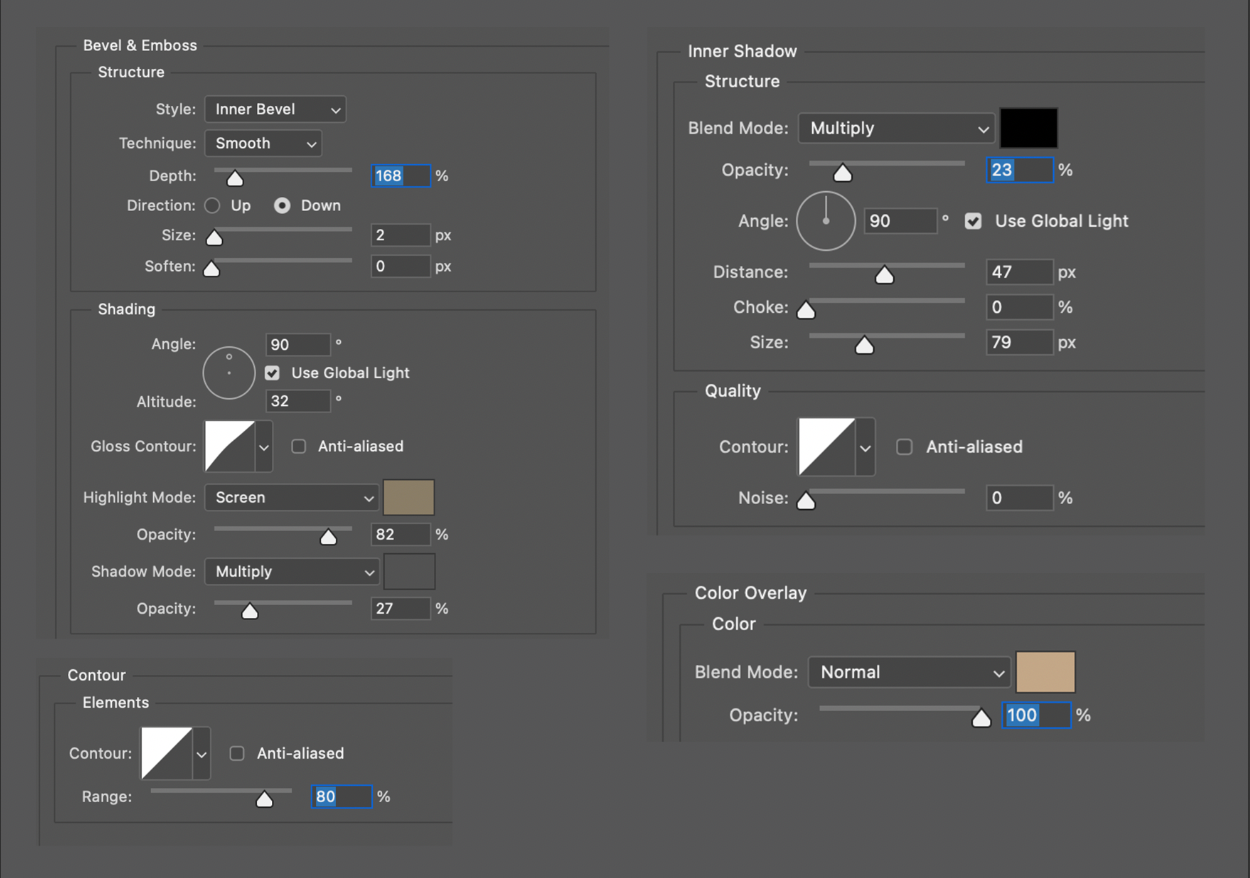
Next I created a new layer above lake(bed) named river/lake(water)with
specs looking:
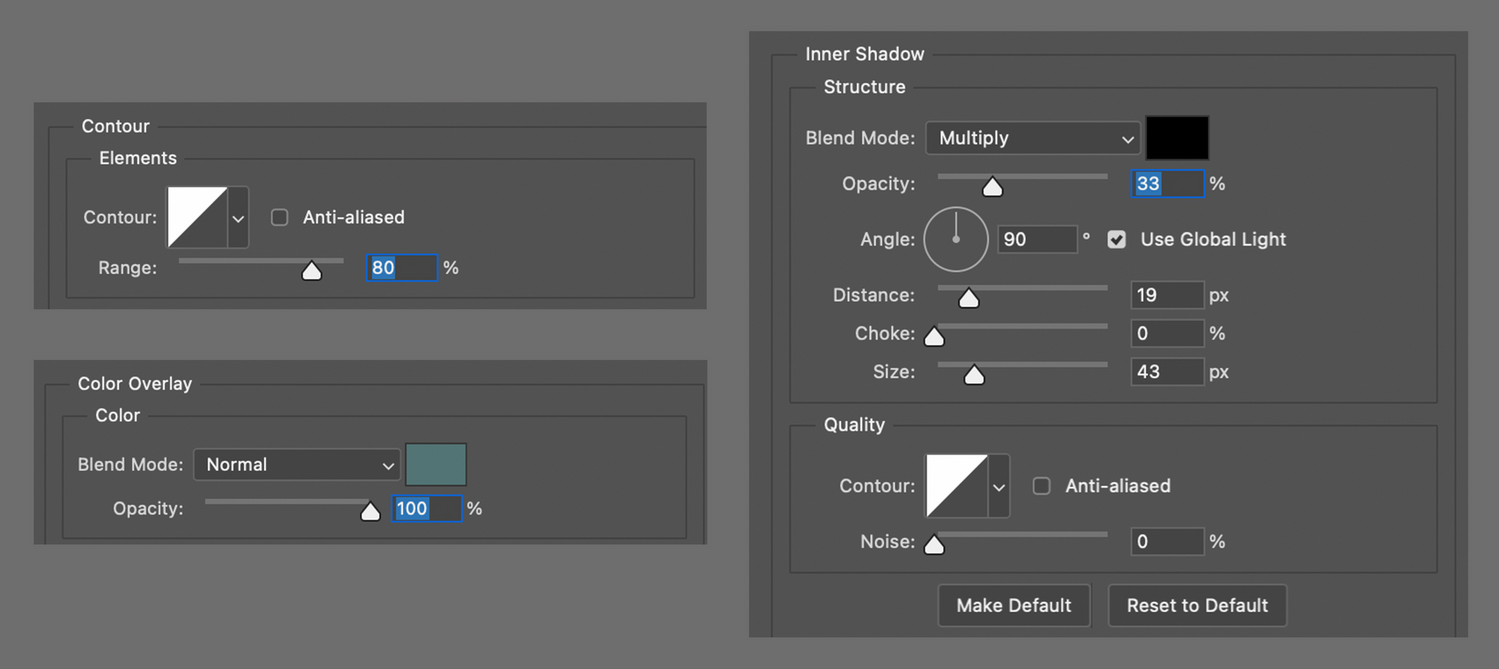
These settings will give the river the illusion of depth.
I then chose a brush of interest and started tracing the rivers following the river_outline layer placed under lake(bed):
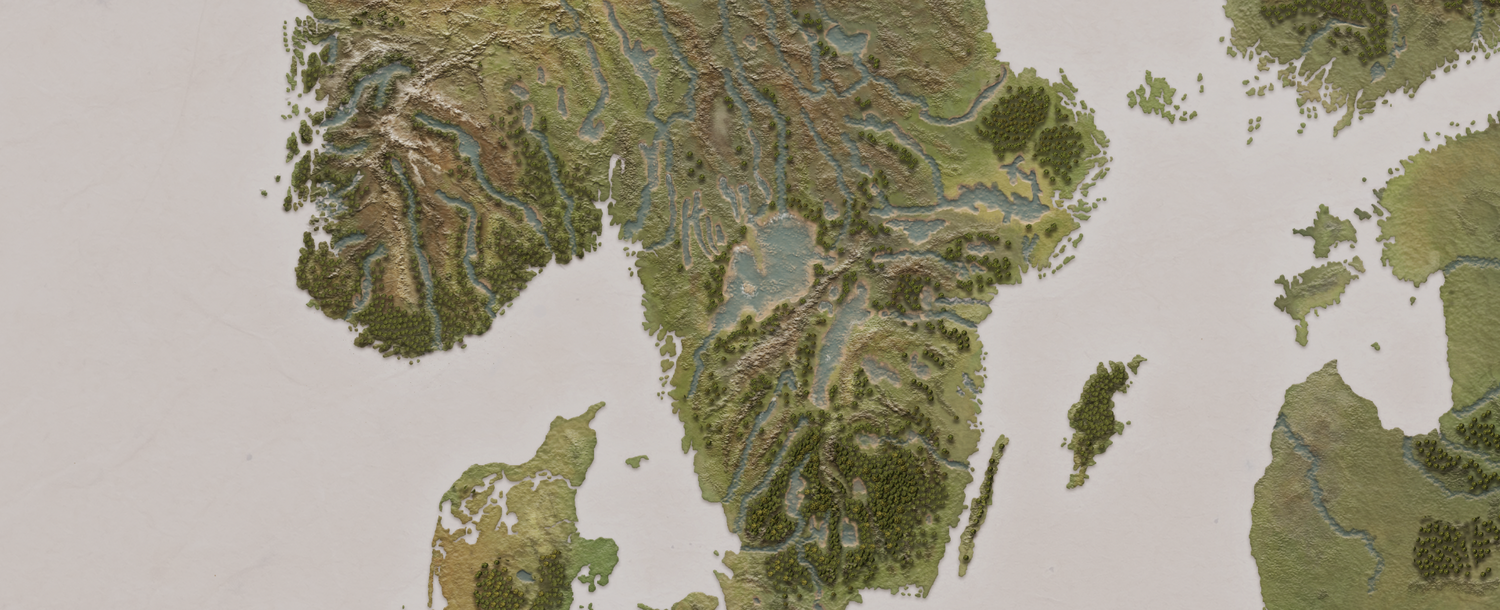
Result:
The rivers were made quite thick because later on in the game, assets like ships would have to sail through them.
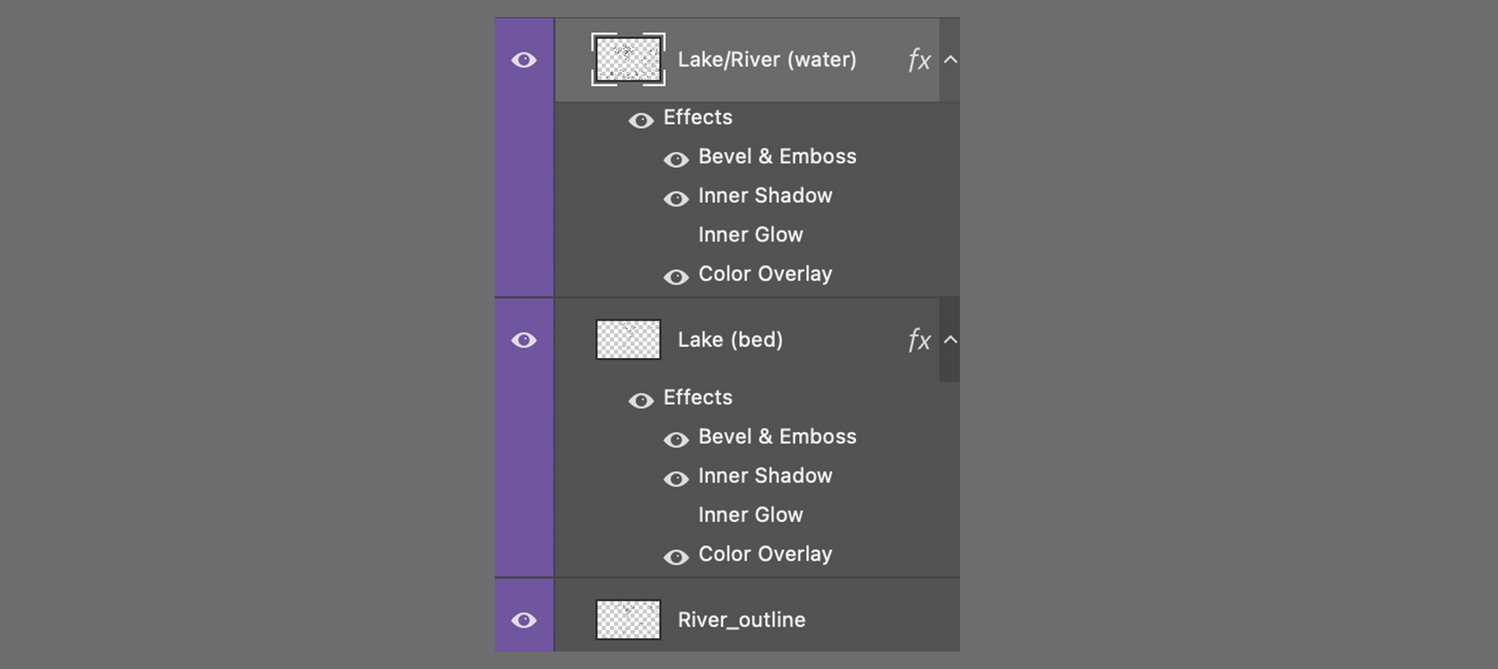
And here you can see all layers so far with visibility on:
In Part III I'll finish off by making the sea and final touches.
No spam, no sharing to third party. Only you and me.


Member discussion